
Workday: Report as a Service (RaaS) via Apideck Proxy API
This guide walks you through creating a Report as a Service (RaaS) in Workday and accessing it via the Apideck Proxy API.
Prerequisites
You'll need:
A Workday account with permissions to create custom reports
An Integration System User (ISU) configured in Workday
A Workday connection in Apideck with:
username– ISU usernamepassword– ISU passwordtenant_id– e.g.acmeinhttps://impl.workday.com/acme/d/home.htmlwsdl_url– e.g.https://services1.myworkday.com/ccx/service
Step 1: Create a Custom Report in Workday
Sign in to Workday with an account that can create reports.
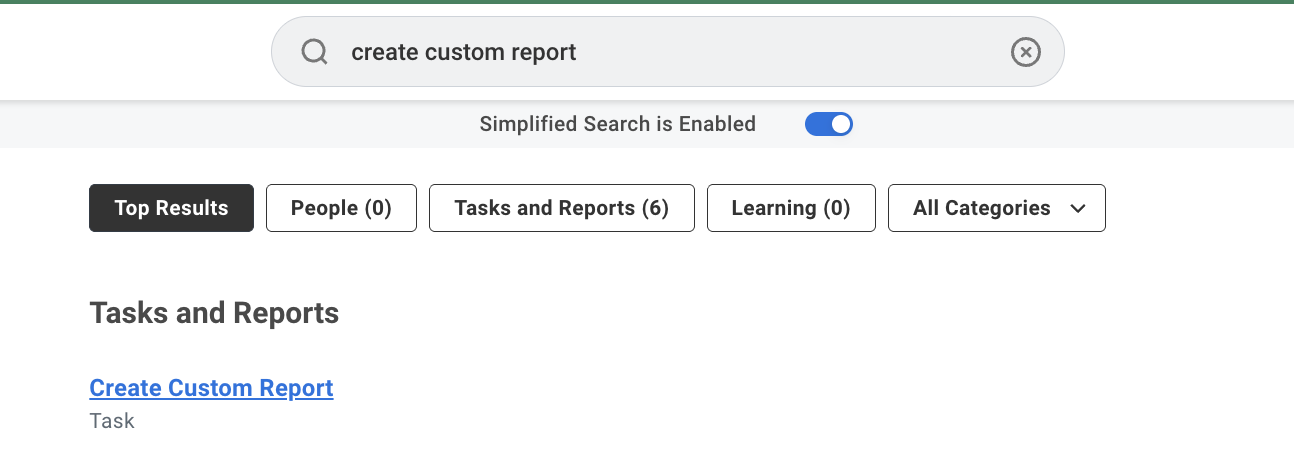
In the global search, open the Create Custom Report task.
Configure the report details:
Report Name: a unique, descriptive name
Report Type: select Advanced — required to expose the report as a web service
Enable as Web Service: ✅ check this box — without it the report won't be accessible via the SOAP API
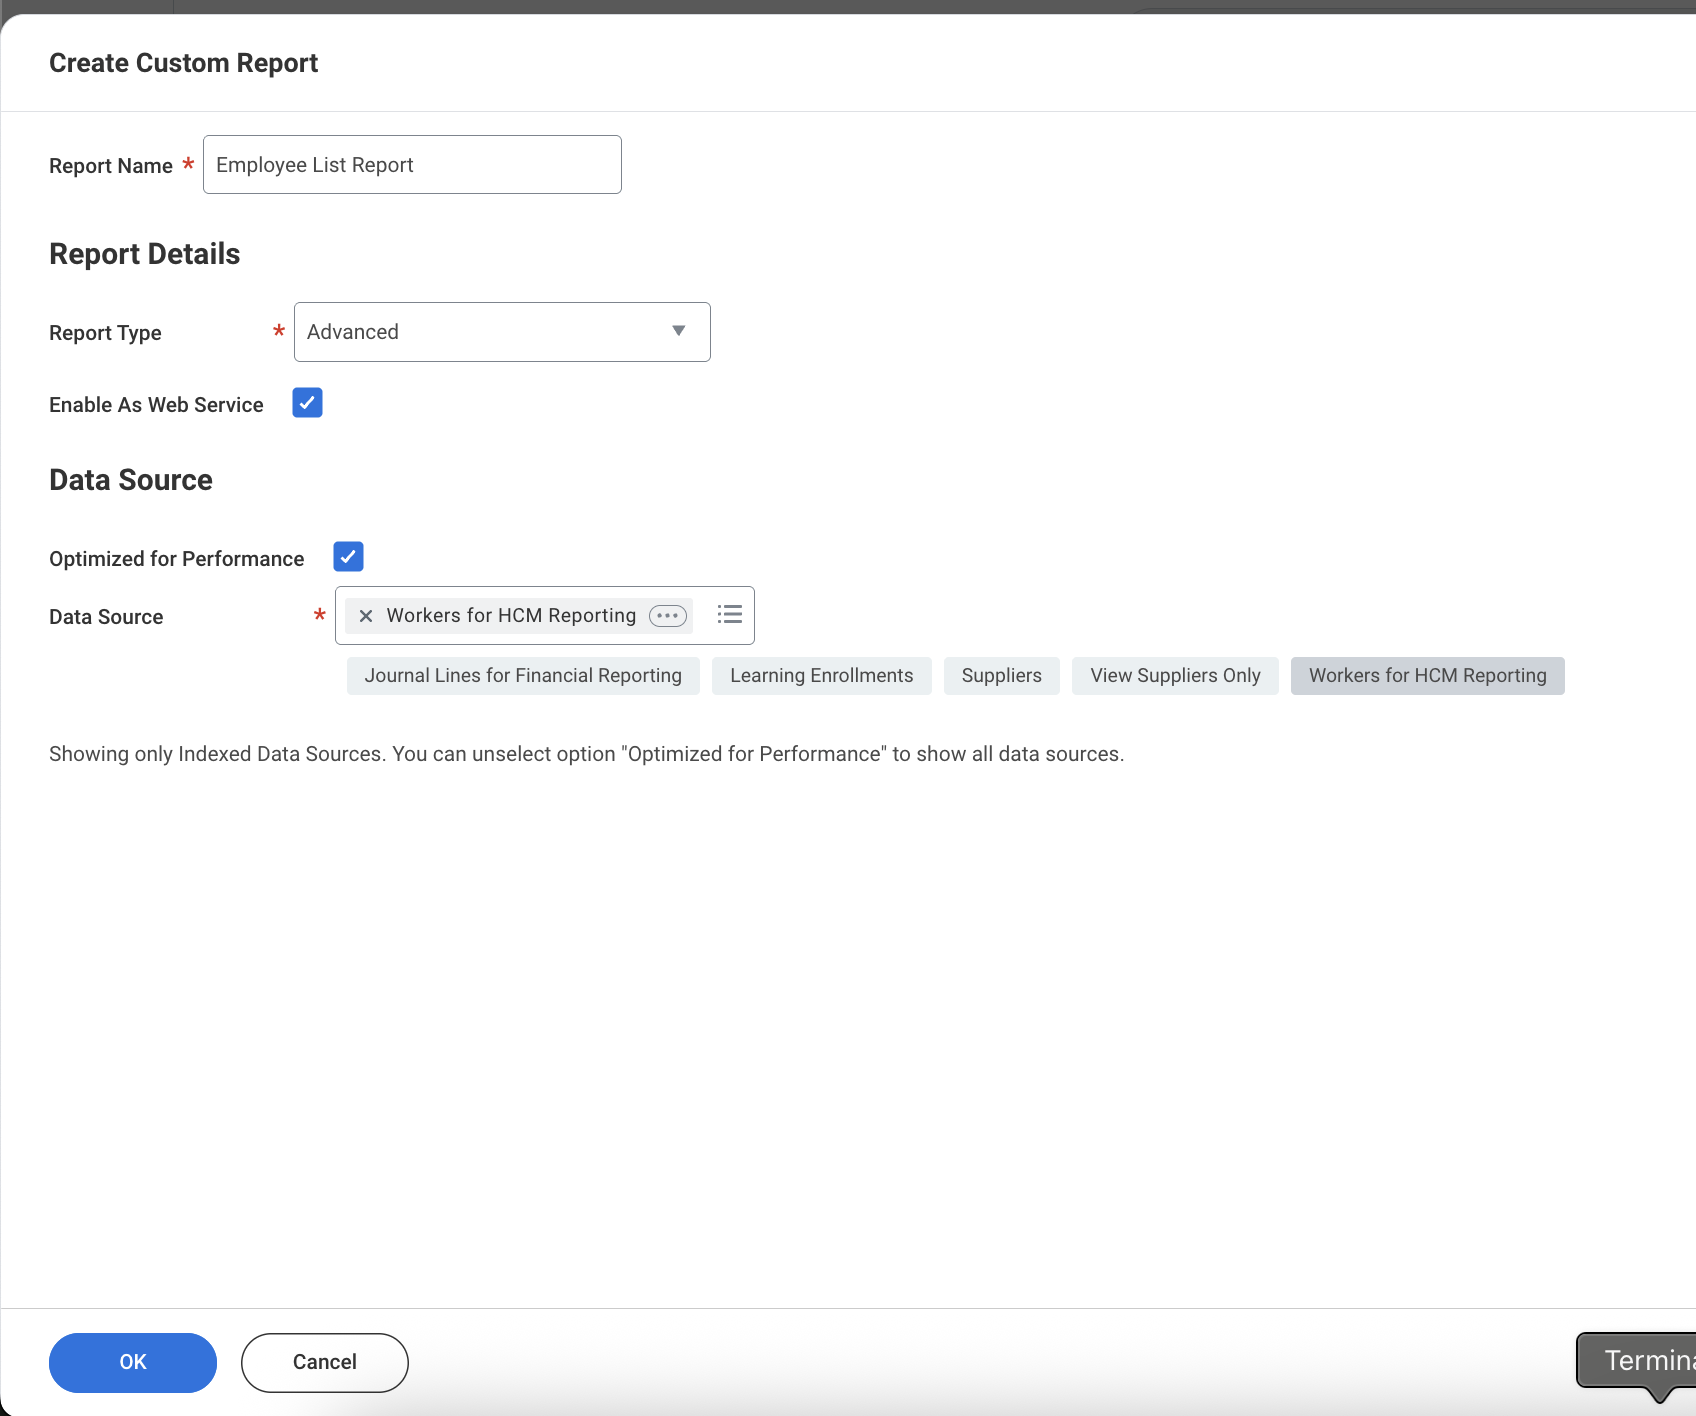
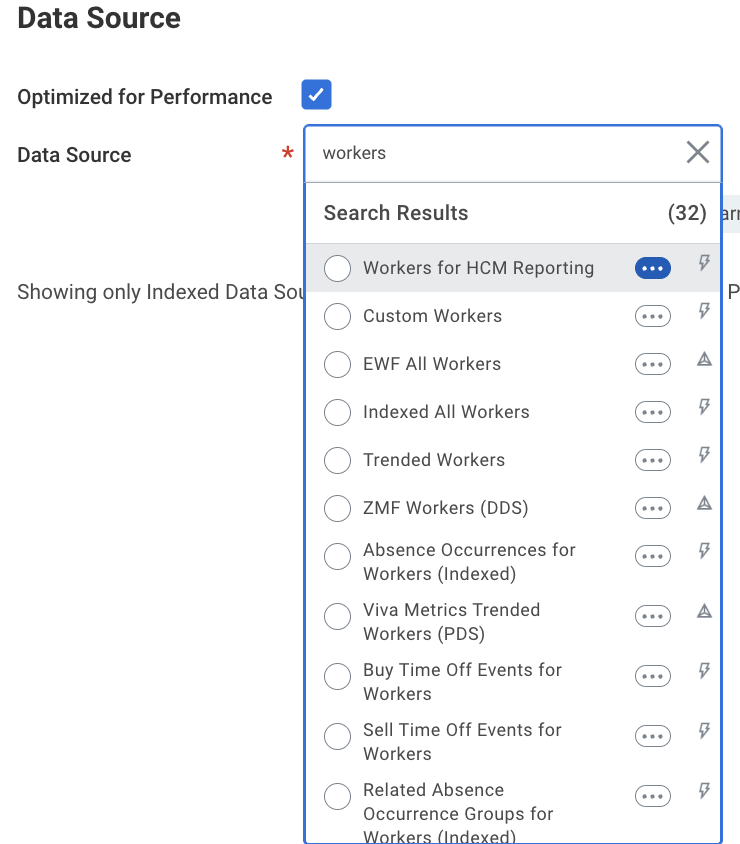
Data Source: select the relevant data source, e.g. Workers for HCM Reporting for employee/worker data
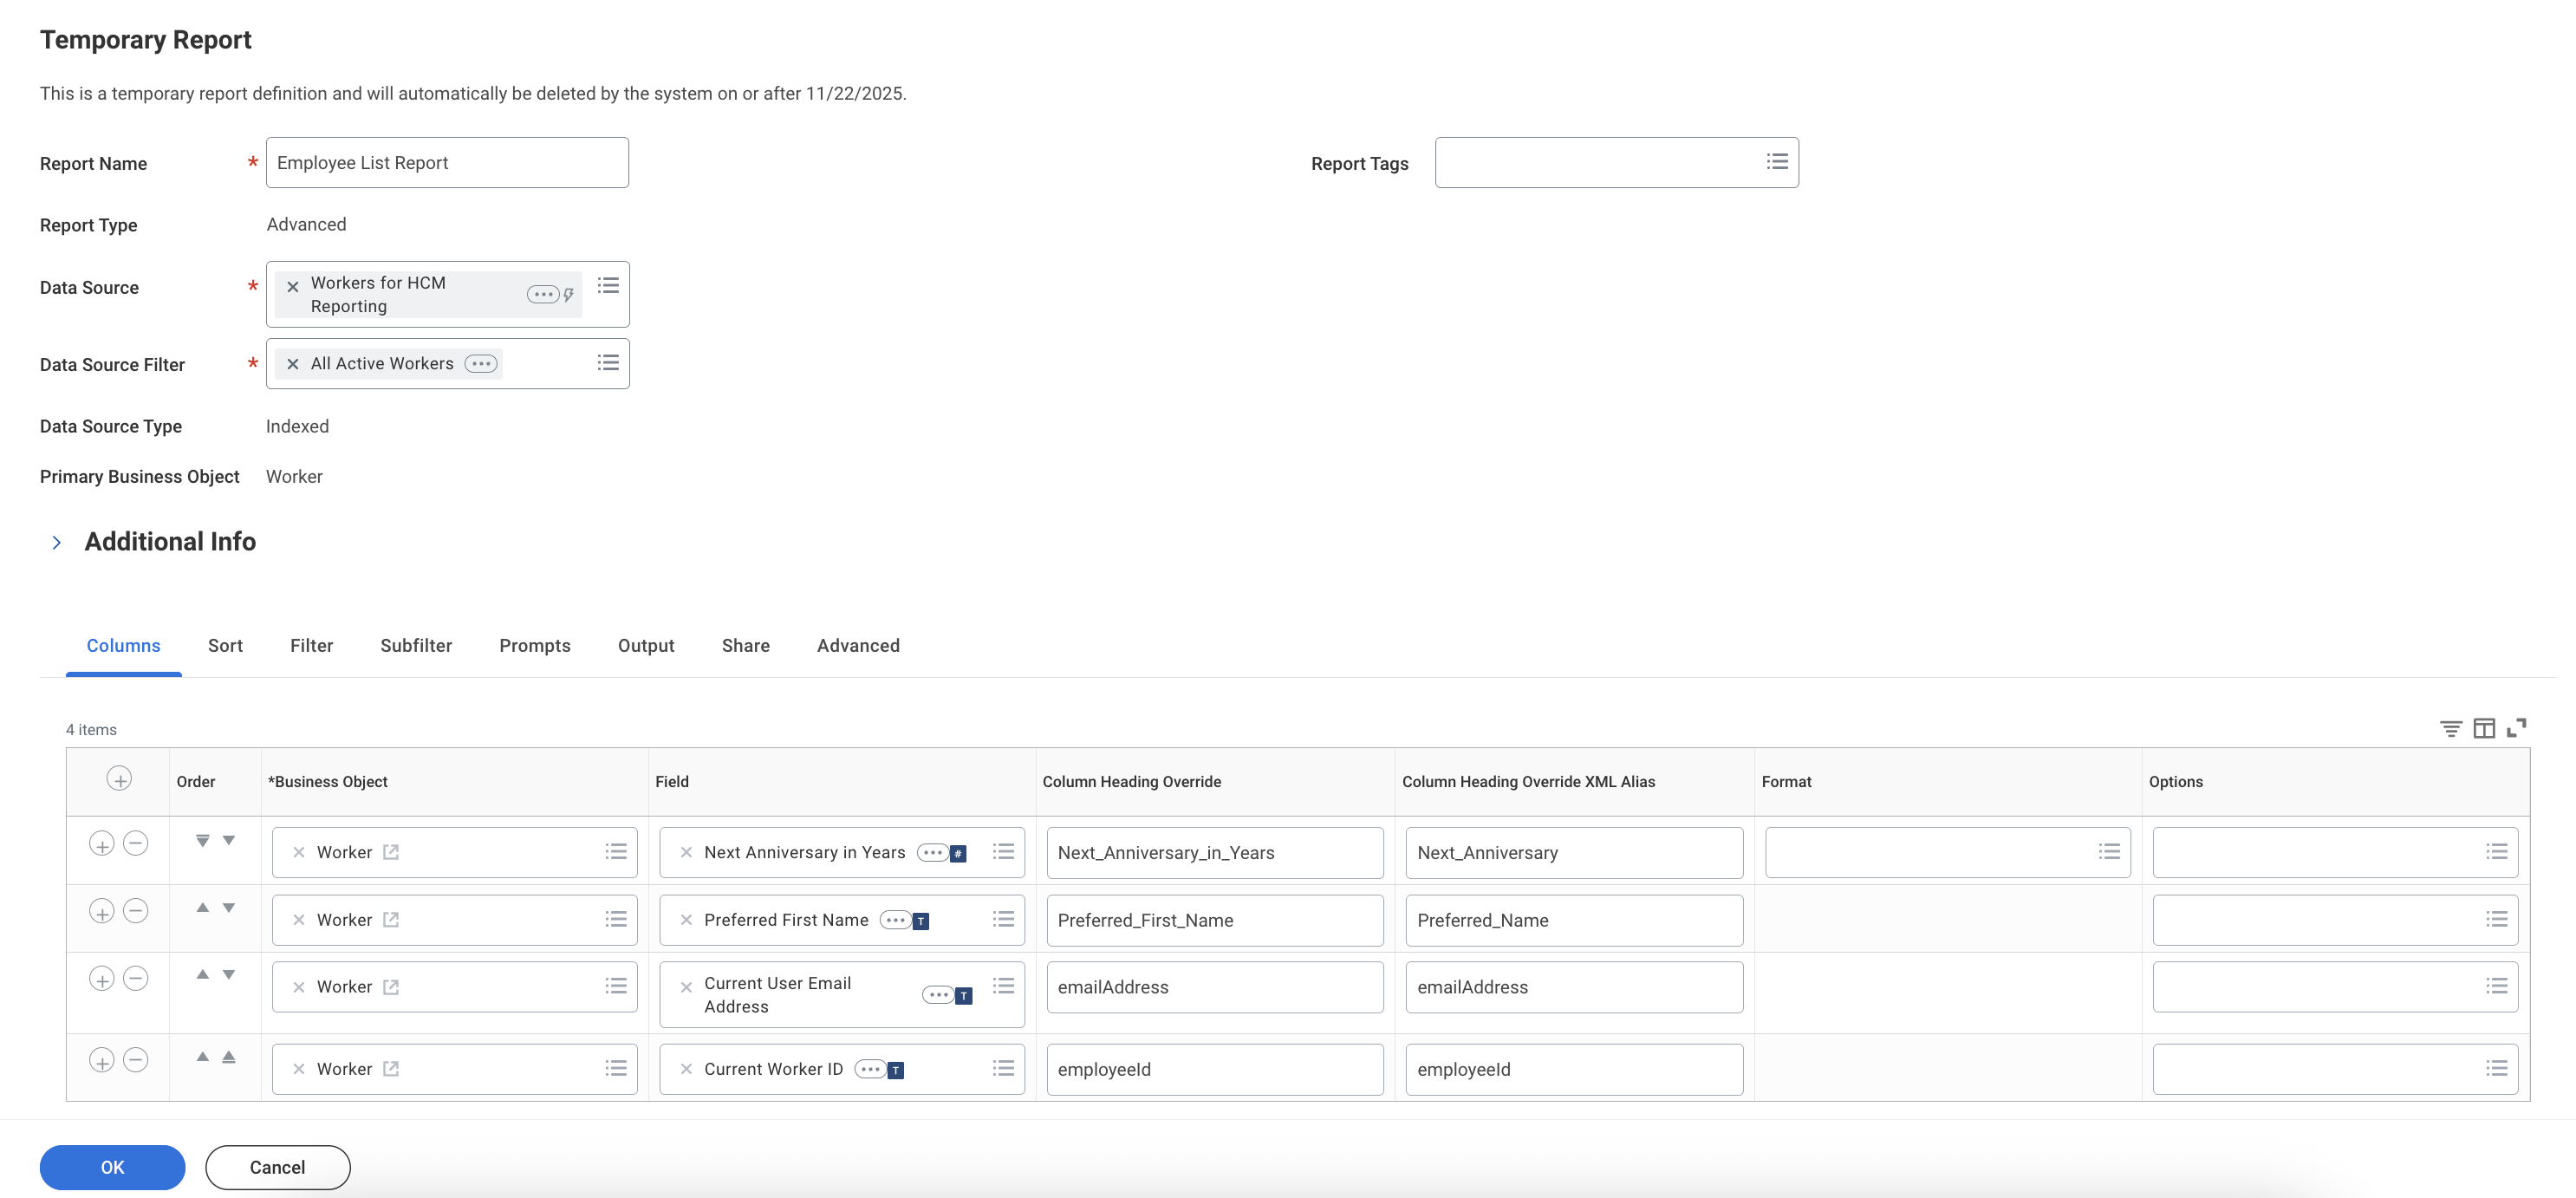
Go to the Columns tab and add the fields you want to expose (e.g. Worker ID, First Name, Last Name, Email, Department, Job Title).
Optionally, go to the Prompts tab to add filters like Effective Date, Department, or Worker Status.
Click OK and note the exact report name — it will be used in the URL.
Step 2: Share the Report with the Integration System User (ISU)
Search for Edit Custom Report and select your report.
Go to the Share tab and add your Integration System User (e.g.
testuser) to the authorized users. This is required — without it you'll see 401 or 403 errors.
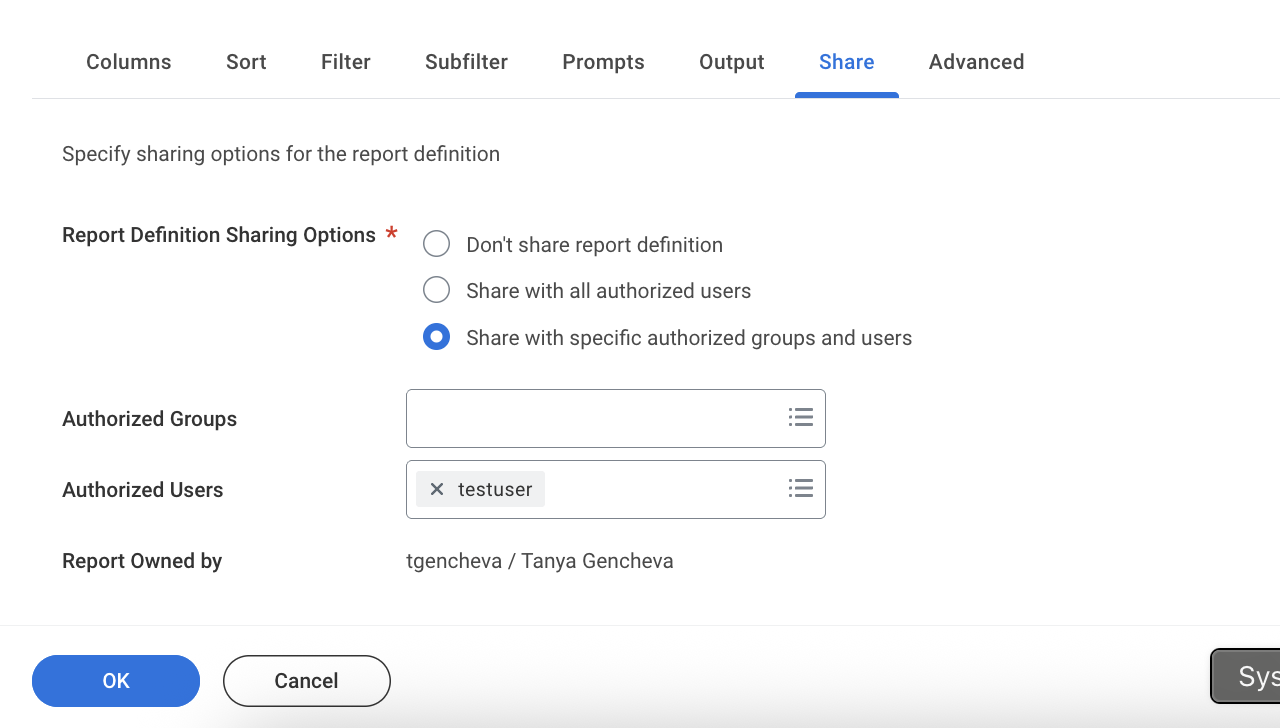
Click OK and verify the ISU is listed.
Step 3: Get the Report URL
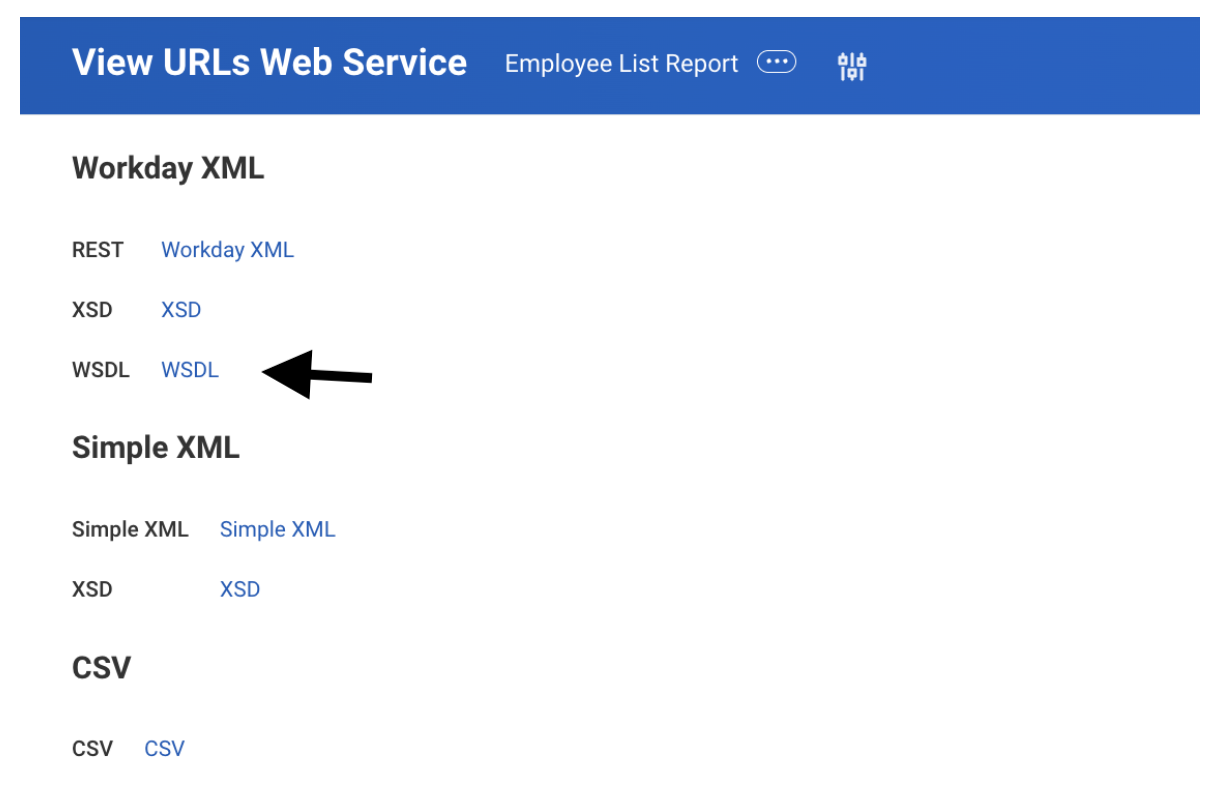
Search for the report by name, open its Actions menu, and go to Web Service → View URLs.
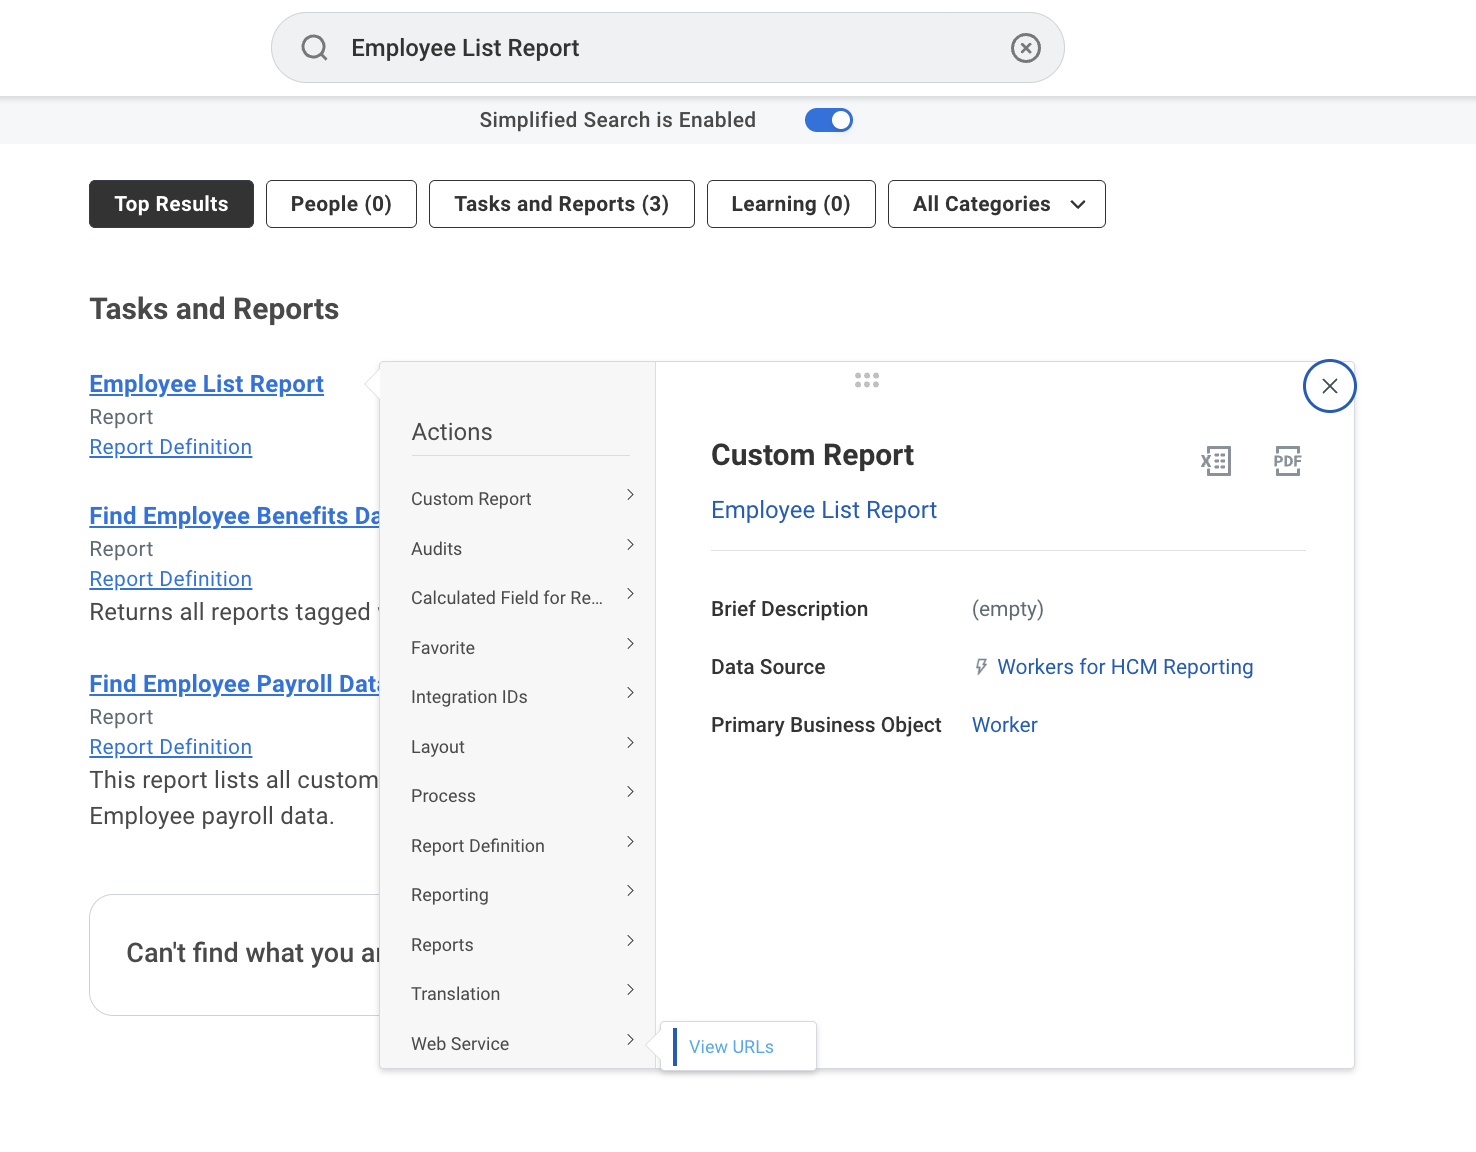
Copy the Workday XML WSDL URL from the dialog.
Step 4: Access the Report via Apideck Proxy API
Downstream URL
Use the Workday XML Report URL from the previous step. Example structure:
https://impl-services1.wd12.myworkday.com/ccx/service/customreport2/acme/reportownername/Employee_List_ReportApideck supports placeholders for connection-level fields only: {username}, {password}, {tenant_id}, {wsdl_url}. Report owner and report name must be hardcoded as they vary per report, not per connection.
Example with placeholders:
{wsdl_url}/customreport2/{tenant_id}/reportownername/Employee_List_ReportcURL example
If you have multiple Workday connections configured, include x-apideck-unified-api to specify which one to use (hris, ats, or accounting). If you only have one Workday connection, this header is optional.
bash
curl --location 'https://unify.apideck.com/proxy' \
  --header 'Authorization: Bearer YOUR_API_KEY' \
  --header 'x-apideck-consumer-id: YOUR_CONSUMER_ID' \
  --header 'x-apideck-app-id: YOUR_APP_ID' \
  --header 'x-apideck-service-id: workday' \
  --header 'x-apideck-unified-api: hris' \
  --header 'Content-Type: application/soap+xml' \
  --header 'Accept: application/xml' \
  --header 'x-apideck-downstream-method: POST' \
  --header 'x-apideck-downstream-url: {wsdl_url}/customreport2/{tenant_id}/reportownername/Employee_List_Report'
Request body
Apideck automatically replaces {username}, {tenant_id}, and {password} with your Vault connection settings.
<?xml version="1.0" encoding="UTF-8"?>
<soapenv:Envelope xmlns:soapenv="http://schemas.xmlsoap.org/soap/envelope/" xmlns:wd="urn:com.workday.report/Employee_List_Report">
  <soapenv:Header>
    <wsse:Security soapenv:mustUnderstand="1"
      xmlns:wsse="http://docs.oasis-open.org/wss/2004/01/oasis-200401-wss-wssecurity-secext-1.0.xsd"
      xmlns:wsu="http://docs.oasis-open.org/wss/2004/01/oasis-200401-wss-wssecurity-utility-1.0.xsd">
      <wsse:UsernameToken wsu:Id="UsernameToken-">
        <wsse:Username>{username}@{tenant_id}</wsse:Username>
        <wsse:Password Type="http://docs.oasis-open.org/wss/2004/01/oasis-200401-wss-username-token-profile-1.0#PasswordText">{password}</wsse:Password>
      </wsse:UsernameToken>
    </wsse:Security>
  </soapenv:Header>
  <soapenv:Body>
    <wd:Execute_Report>
      <wd:Report_Parameters>
      </wd:Report_Parameters>
    </wd:Execute_Report>
  </soapenv:Body>
</soapenv:Envelope>
Expected response
Workday returns raw XML. The structure depends on the columns you configured. Example:
<?xml version="1.0" encoding="UTF-8"?>
<env:Envelope xmlns:env="http://schemas.xmlsoap.org/soap/envelope/">
  <env:Body>
    <wd:Report_Data xmlns:wd="urn:com.workday.report/Employee_List_Report">
      <wd:Report_Entry>
        <wd:Worker_ID>12345</wd:Worker_ID>
        <wd:First_Name>John</wd:First_Name>
        <wd:Last_Name>Doe</wd:Last_Name>
        <wd:Email>john.doe@example.com</wd:Email>
      </wd:Report_Entry>
    </wd:Report_Data>
  </env:Body>
</env:Envelope>